Viewing channel information
Among the field values displayed for a channel are its channel type and name, as well as whether the channel is an input or output channel, as shown in Figure 21.
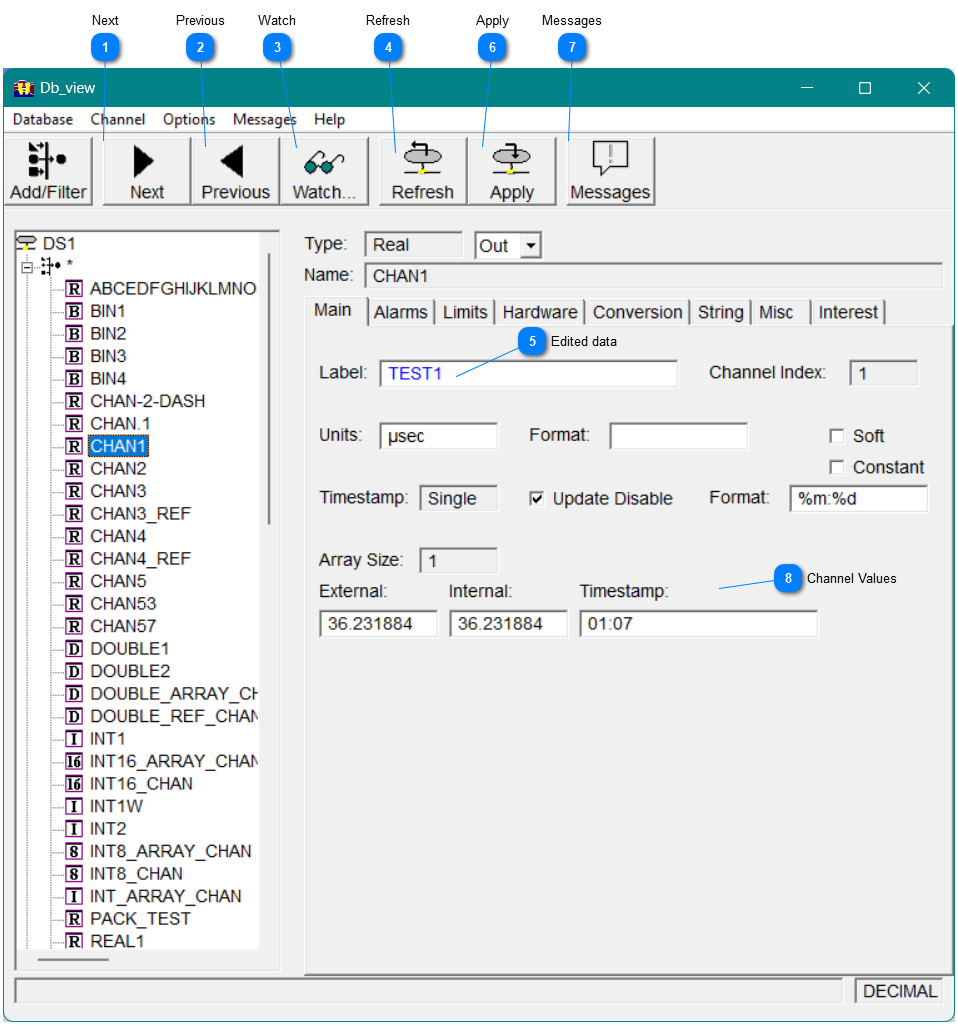
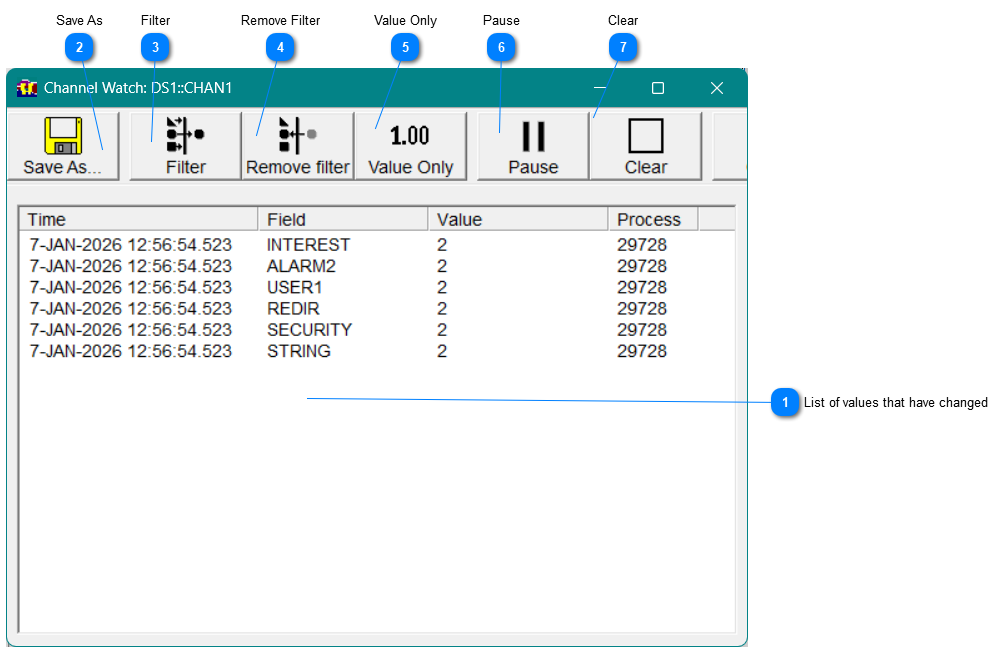
WatchSelect Watch to view changes made to a channel by db_view and other programs. See Displaying changes to a channel using Watch.
|

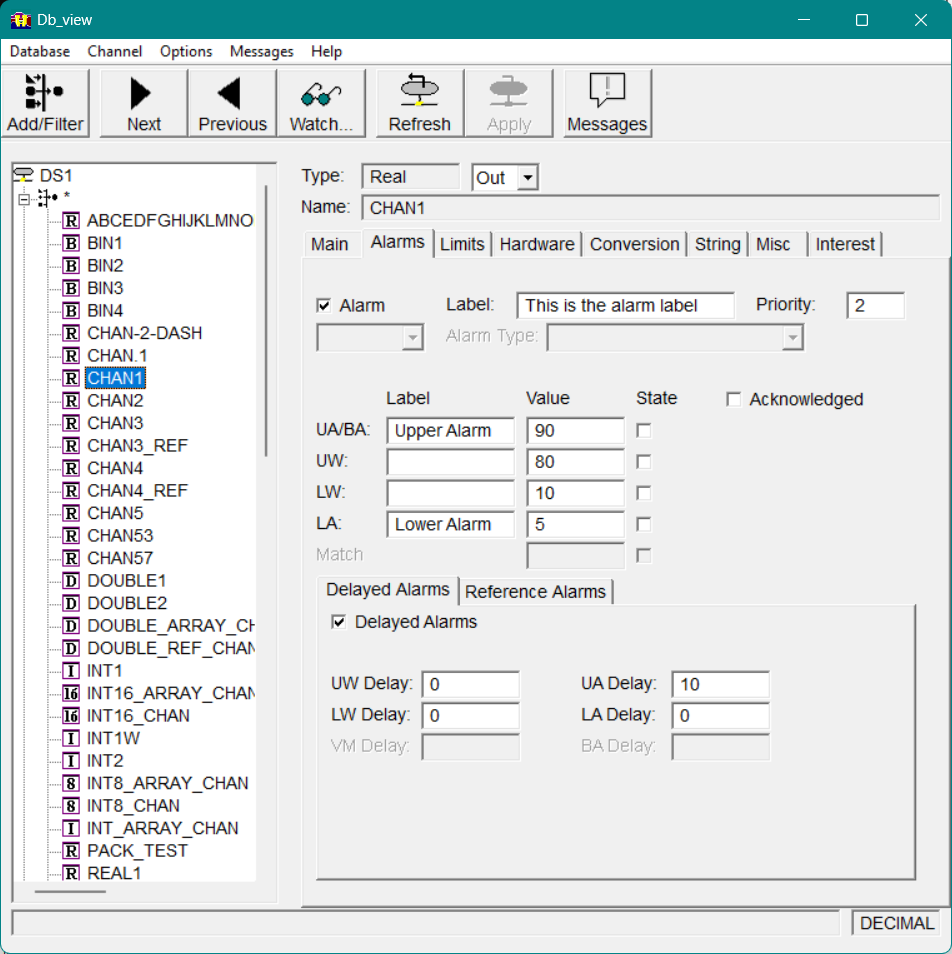
Alarms Tab
The Alarms tab displays the alarm information for the selected channel.
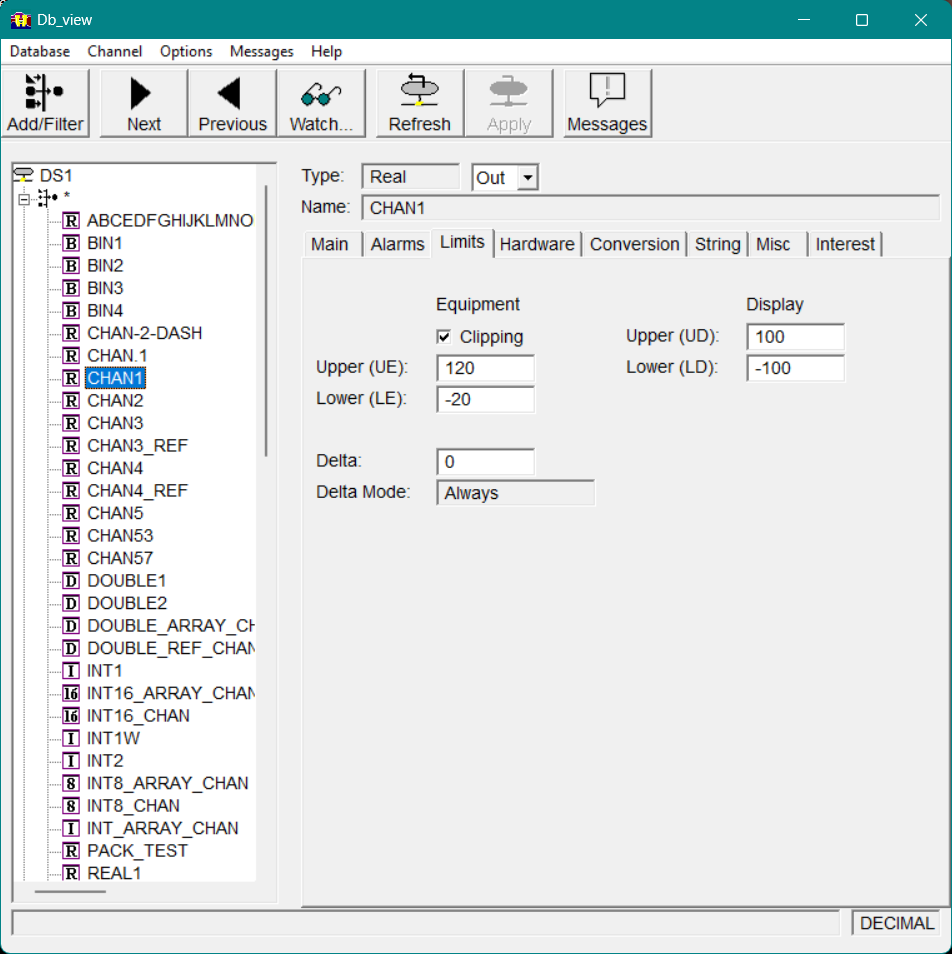
Limits Tab
Use the Limits tab to view the following limits for the selected channel.
Hardware Tab
The Hardware tab displays the following hardware values.
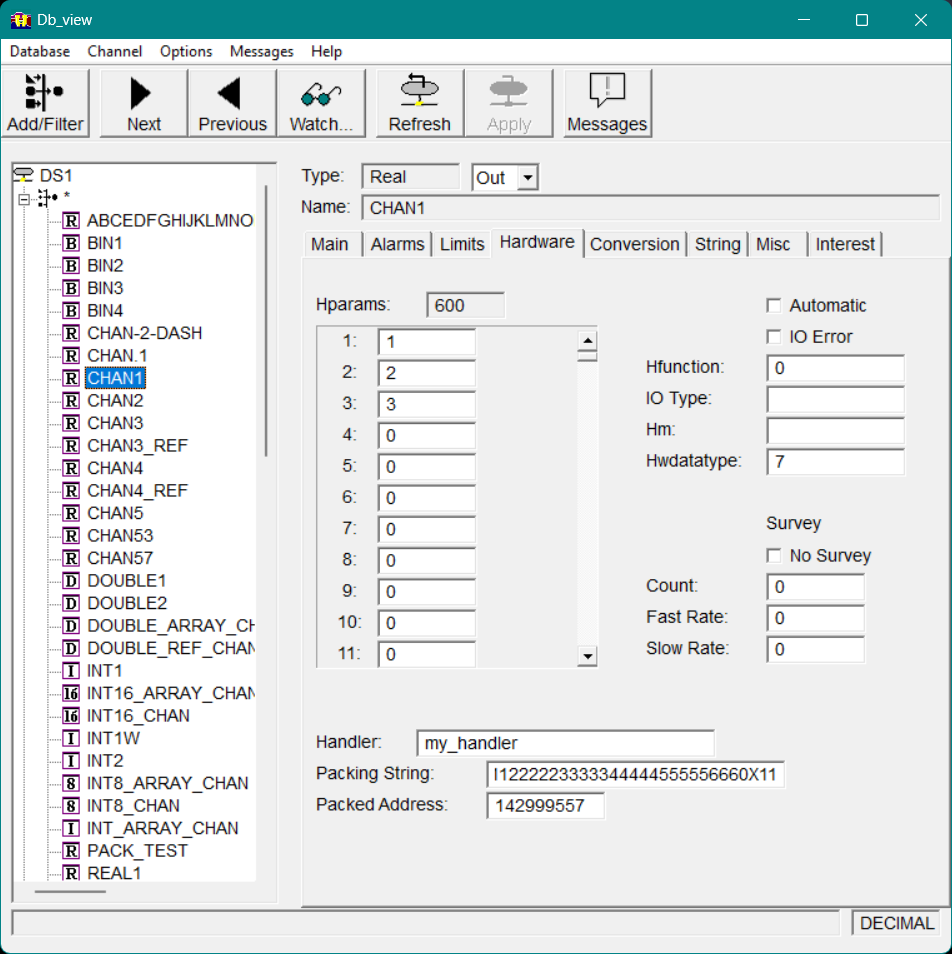
Hparams
The Hparams list box displays the hparams used to store address and configuration information for the hardware.
Automatic
If this option is selected, and if the selected channel is an output channel, whenever a put is performed on the channel, its handler is automatically called.
If the selected channel is an input channel, whenever a get is performed on the channel, its handler is automatically called.
Note that if Automatic is enabled, there should also be a handler specified for the channel (see See HandlerSee Handler).
Db_view dialog Hardware tab
IO Error
This option displays the I/O error status. If an I/O error is indicated, it is usually set by the return of a zero value from the handler of the channel.
Hfunction
This field shows the function to be executed by the handler subroutine of the selected channel. The hfunction is an integer value that can be used to issue different commands to a single handler.
IO Type
This field shows the I/O bus structure used for the selected channel. The only reserved type is CAMAC, which must be used for all CAMAC channels to properly store the CAMAC address. Any other definitions are at the discretion of the staff responsible for implementation.
Hm
This field shows the type of hardware associated with the selected channel, as determined by the hardware module type defined by the system designer. This information is used in hardware communications, as determined by the application.
Hwdatatype
This field shows the data type the hardware is expecting.
Survey
The following field s show the survey fields for the channel.
No Survey
If this option is selected, Vscan will not read the hardware assigned to the selected channel. (For information about Vscan, see Chapter 2 See Vscan.)
Count
The value in this field shows the SURVEY_COUNTER field for a channel. The function of this keyword is assigned by the application designer.
Fast Rate
The value in this field shows the FAST_SURVEY_COUNT field for a channel. The function of this keyword is assigned by the application designer.
Slow Rate
The value in this field shows the SLOW_SURVEY_COUNT field for a channel. The function of this keyword is assigned by the application designer.
Handler
This field shows the name of the user-written subroutine that will be called for the selected channel. This option performs the appropriate hardware I/O for controlling or reading your device.
-
If the selected channel is an output channel, its handler is automatically called whenever a put is performed on the channel.
-
If the selected channel is an input channel, its handler is automatically called whenever a get is performed on the channel.
Packing String
This field shows the name of the packing algorithm used to generate packed hardware addresses.
Packed Address
This field shows the resultant hardware address generated by the packing string for the channel.
Conversion Tab
The Conversion tab displays the following conversion values.
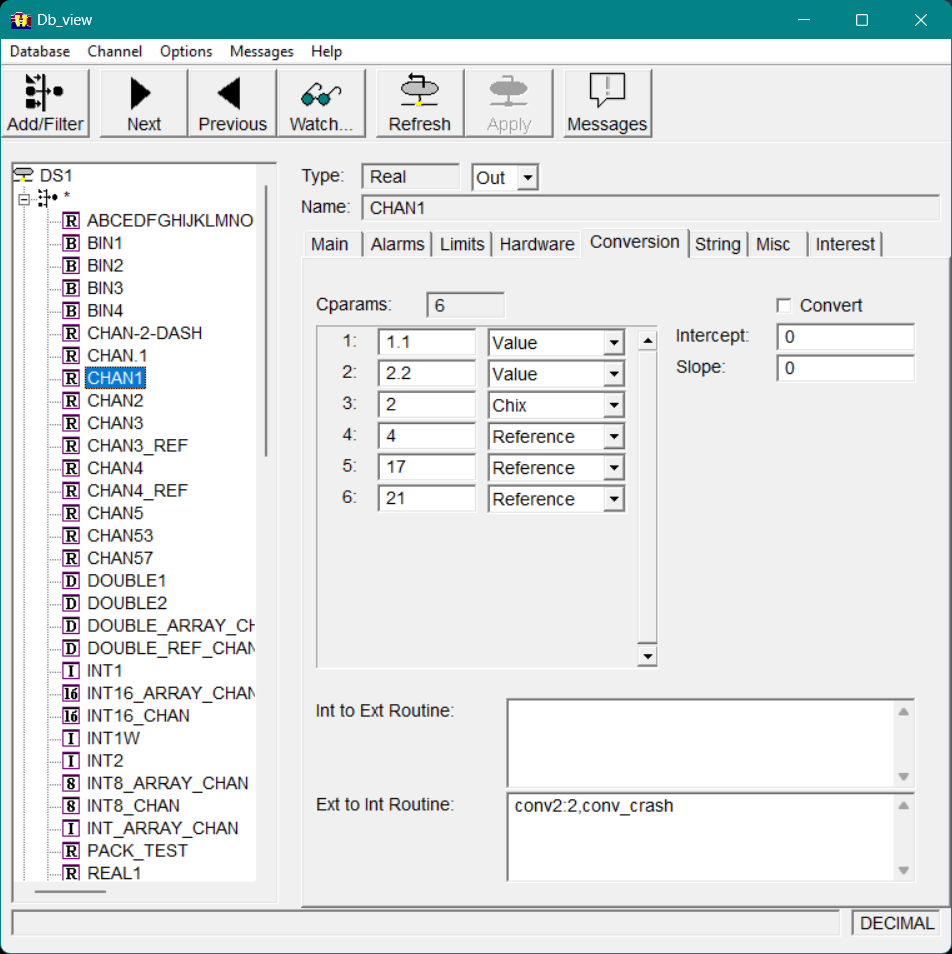
Cparams
If cparams have been defined for the channel, the Cparams list box contains several columns of information. The numbers in the left-hand column show the cparams used to store conversion information for the user-written conversion routines specified by the Vgen keywords inttoext and exttoint . The maximum number of cparams allocated for the channel depends on the largest cparamX keyword specified. (For information about specifying cparams and definitions of the inttoext and exttoint keywords, refer to Chapter 1 Vgen Keywords in your Vsystem Vaccess Reference Guide.)
The value of each cparam is displayed in the center column of the Cparams list box. In the column to the right of this value is a drop-down list specifying the type of cparam, which can be one of the following:
|
value
|
A floating-point value.
|
|
chix
|
A channel index.
|
|
reference
|
A channel index that is passed the external value of the specified channel when used for the conversion routine.
|
Convert
When selected, this option enables the user-specified conversion mechanism on the selected channel. For real and double channels, a linear conversion is used if the slope value is nonzero for the selected channel; otherwise, no conversion is made.
Intercept
The value specified for this option is the value for B in the conversion formula E=MI+B where:
E is the external value (the value seen by the user).
I is the internal value (the value stored in the database).
M is the slope provided with the slope keyword.
Slope
If the value specified for this option is nonzero, linear conversions will be performed. The value specified for this option is the value for M in the conversion formula E=MI+B where:
E is the external value (the value seen by the user).
I is the internal value (the value stored in the database).
B is the intercept provided with the intercept keyword.
Int to Ext Routine
This field shows the name of the routine that performs conversions when performing a hardware put to the database, and converts from internal to external units.
Ext to Int Routine
This field shows the name of the routine that converts the value put into the database from external to internal units.
String Tab
The String tab displays the values for the sparams. This tab lists any string parameters defined for the channel.
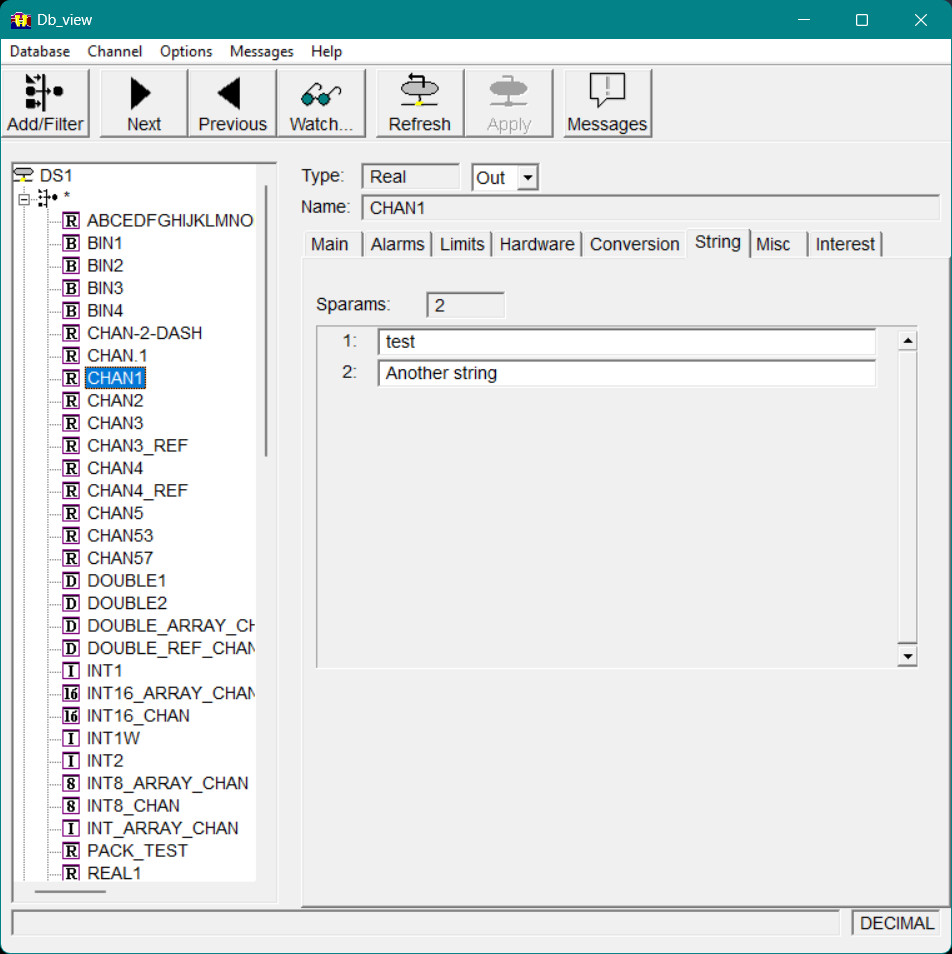
Sparams
The Sparams list box displays the sparams used to store strings for user-defined applications.
Misc Tab
The Misc tab displays the following miscellaneous options.
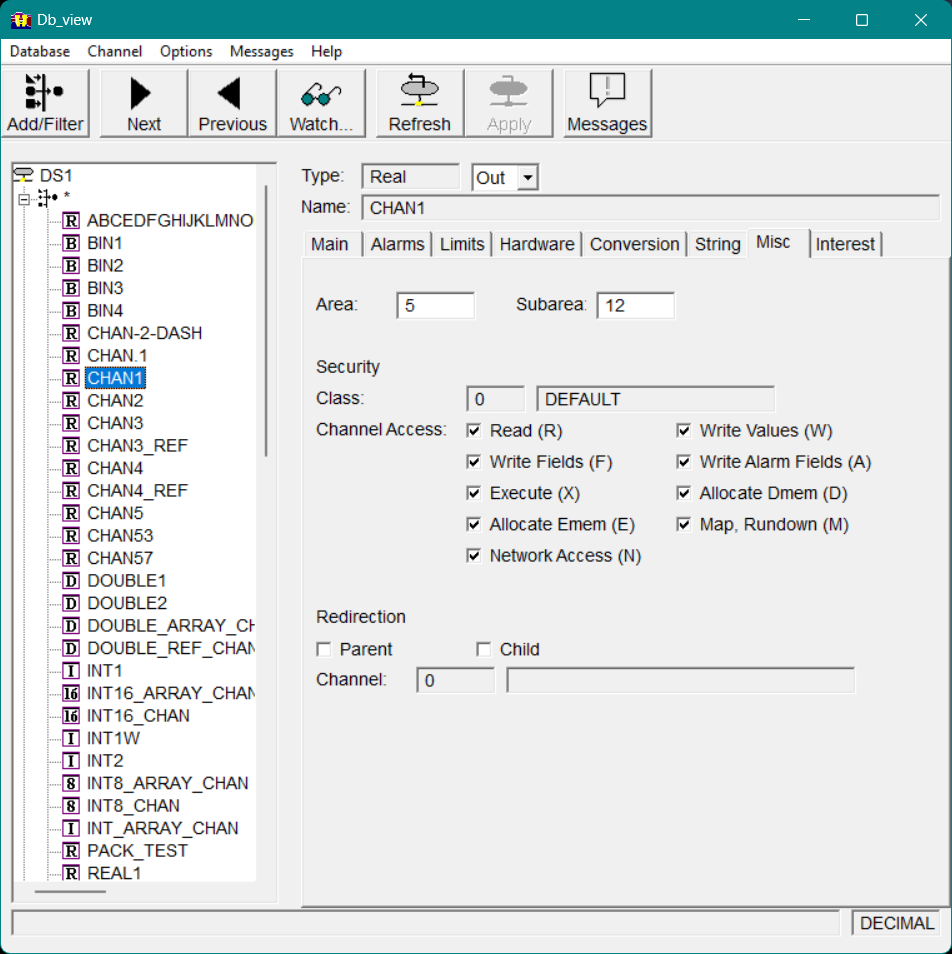
Db_view dialog Misc tab
Area
This field shows the area specified for the channel.
Subarea
This field shows the subarea specified for the channel.
Security
Class
This field shows the security class specified for the channel for the current user.
Channel Access
These options show the access available to the current user.
Redirection
Parent
If this option is selected, the channel being viewed is the redirection parent.
Child
If this option is selected, the channel being viewed is the redirection child.
Channel
These field s show the channel index and name of the associated channel.
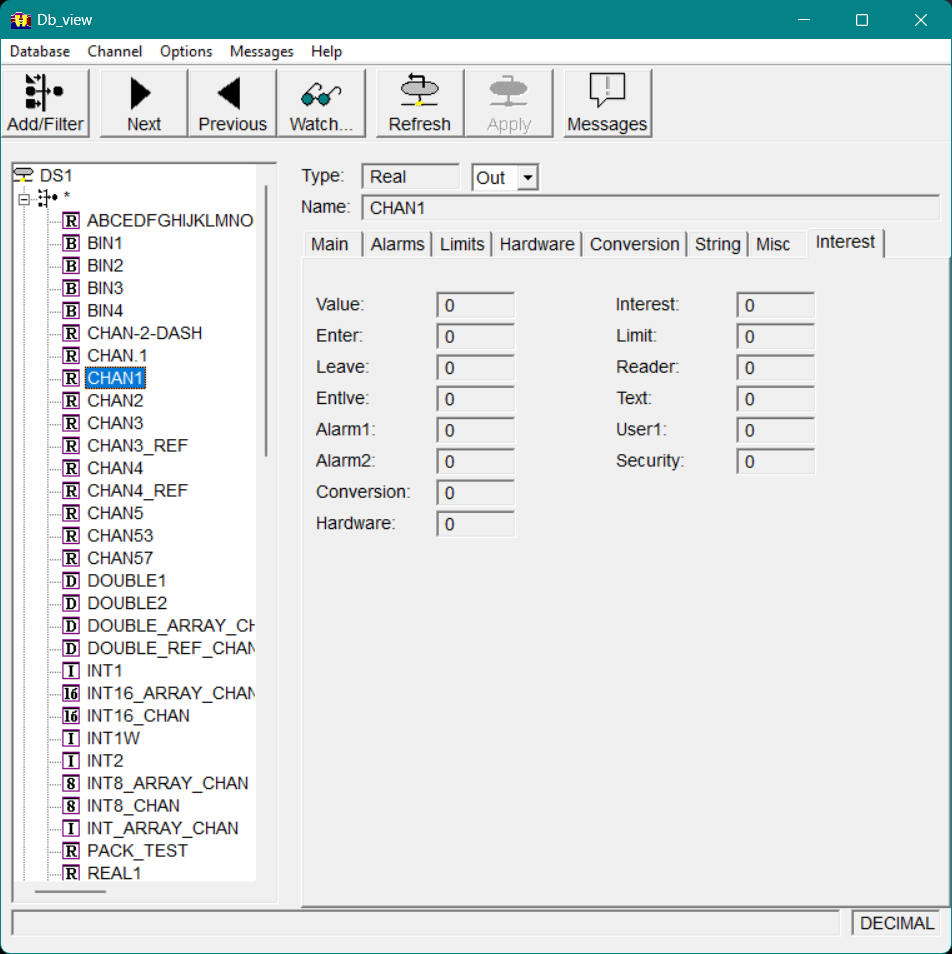
Interest Tab
View the various interest values for the selected channel on the Interest tab.
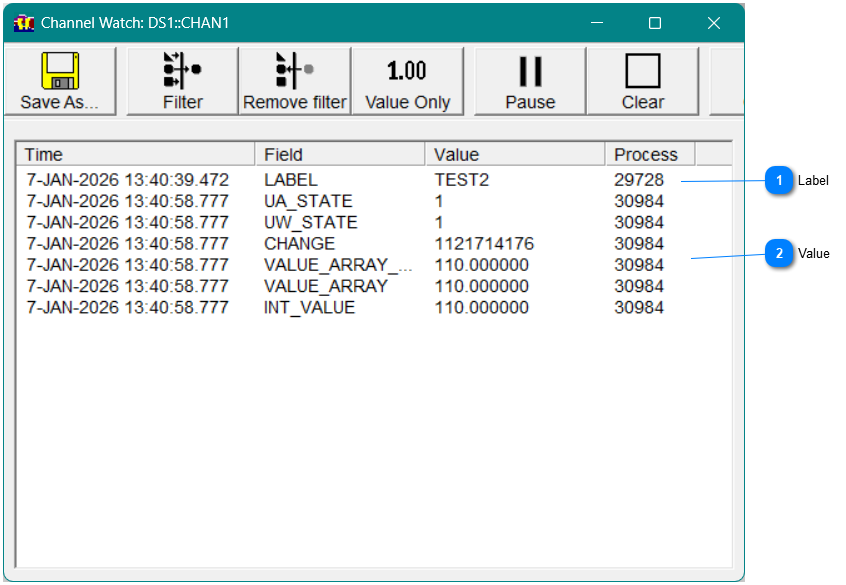
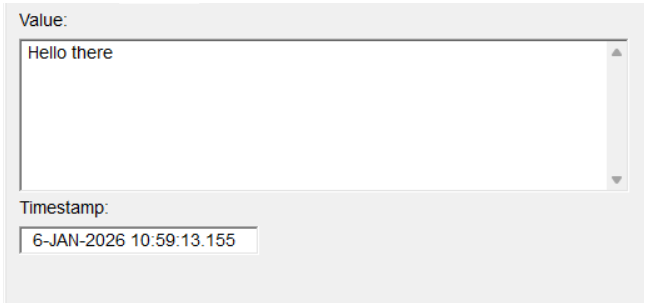
You can view changes that are made to specific channels by selecting them to be "watched". This adds an event to the channel on all of the fields. When a field is changed, the new value wil appear in the list. The Watch window appears, as shown below.